Dieu Linh
Dec 12 2025 •3 minutes
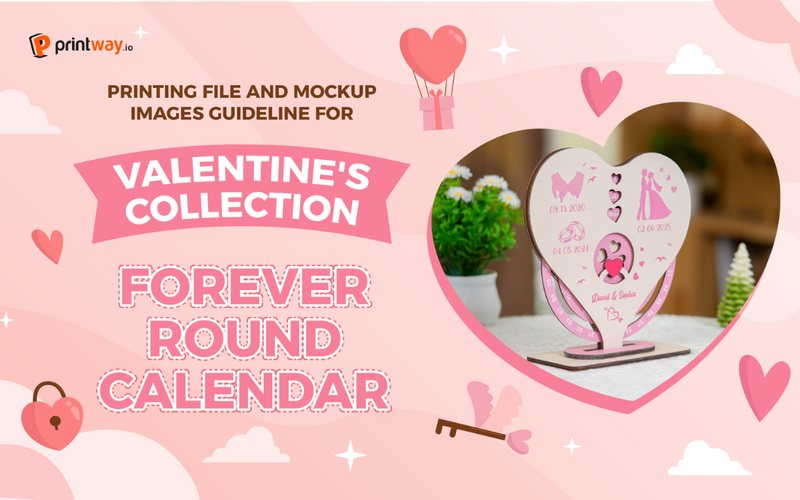
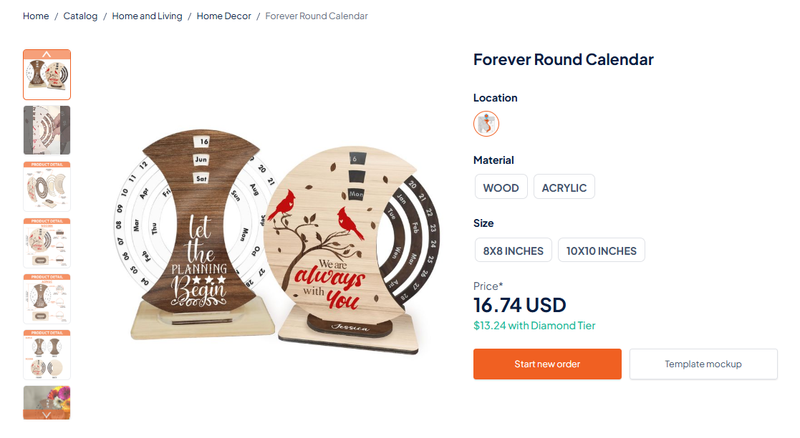
If you're looking to launch a unique, personalized product for your store, the Forever Round Calendar from Printway is a fantastic option. This is a beautiful, layered wood/acrylic calendar that makes a perfect gift for anniversaries and special occasions. This is also estimated as one of the top-selling products for the upcoming Valentine's Day. This guide will walk you through the process of creating the print files and generating a professional mockup image using the provided templates.
To successfully sell this unique item, you need to master two key steps: creating the perfect print file and generating an eye-catching mockup. This guide will walk you through the process step-by-step.
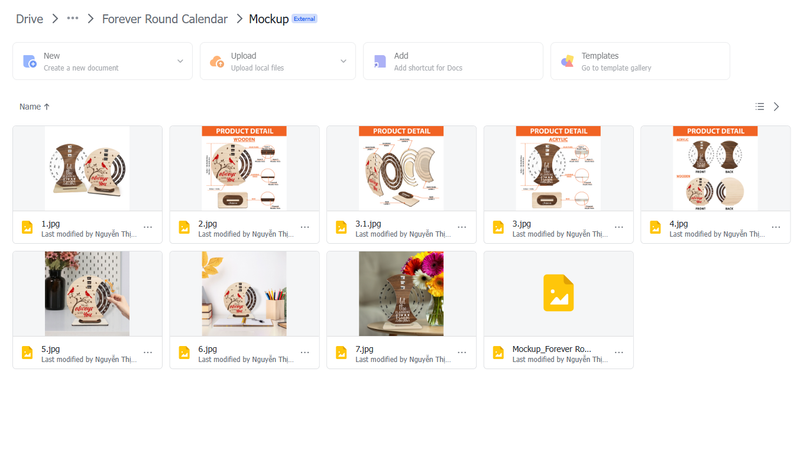
To begin, you need to download the official template and mockup files from the Printway website.
Visit Printway.io: Navigate to the official Printway website.
Find the Product: Click on the Catalog section and use the search bar to find the Forever Round Calendar.
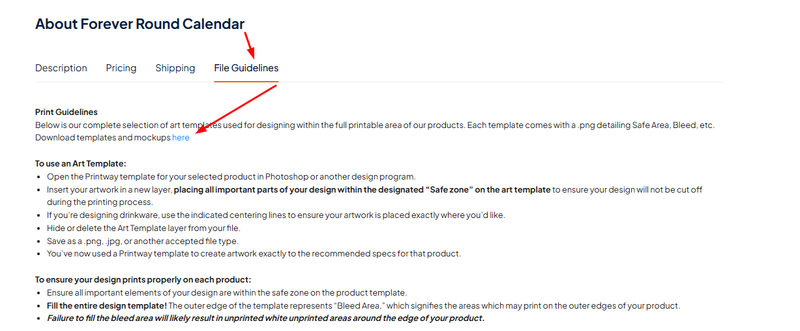
Access File Guidelines: On the product page, scroll down and click on the File Guidelines section.
Download the Files: Click the link provided within the guidelines to download the compressed file, which contains both the Mockup and the Template files. Ensure you download both.
The printing file template is a guide that dictates the design for all the separate layers and pieces of the calendar.
1- Open the Template: Open the downloaded printing template file (e.g., Template_Bin_Forever Round Calendar.tif) using an image editing software like Adobe Photoshop or Photopea.
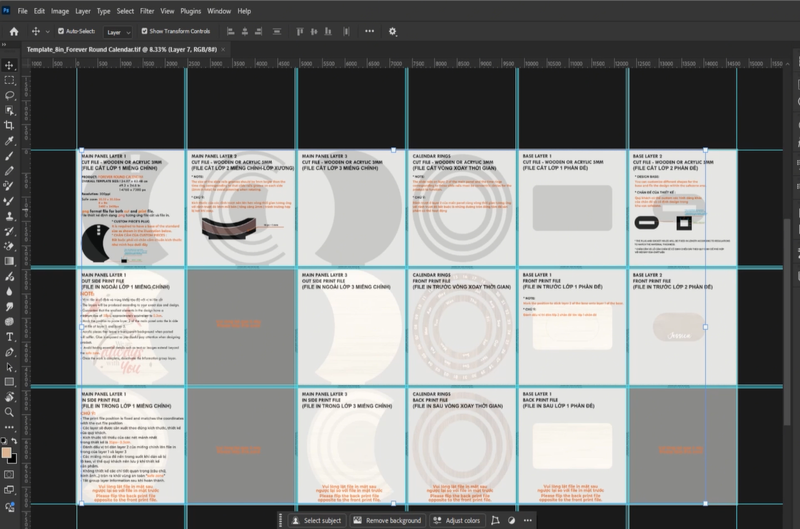
2- Understand the Layout: The template is organized into a grid that corresponds to the different pieces of the calendar. You must prepare both the Cut File and the Print Files for every component.
3- Design Guidelines:
Safe Zone: All important design details (text, main imagery) must be kept within the designated safe zone.
First Row (Cut File): The top row represents the cutting file. The shapes here must be in a solid black shade and define the precise contour of the window cut-outs for the calendar's main body.
Second Row (Front Print): The second row contains the designs for the front side of each calendar layer and base.
Third Row (Back Print): The third row is for the designs on the backside of the product pieces.
File Specifications: Always refer to the notes written on the template file for specific requirements.
Resolution: The file format should be PNG with a resolution of 300 DPI. (The video shows a suggested size of 14760 px x 7380 px)
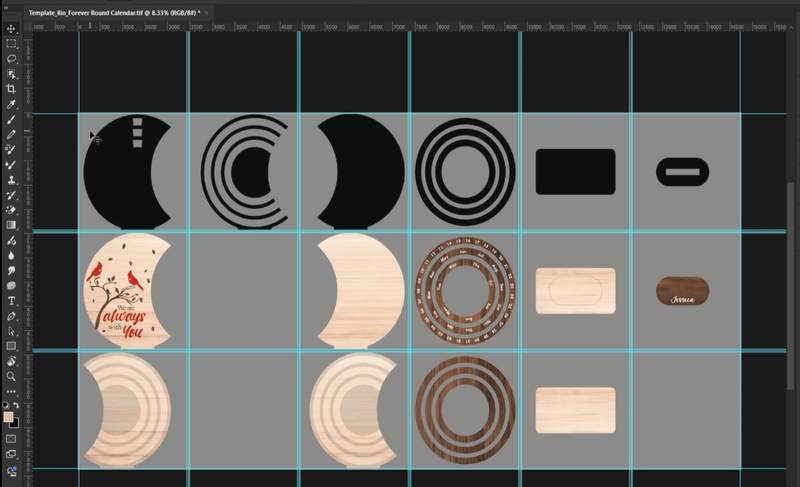
Once your printing file is complete, use the mockup template to visualize the final product.
1- Open the Mockup File: Open one of the provided mockup files (e.g., Mockup_Forever Round Calendar.tif) in Photoshop/Photopea. You will see a scene with the un-designed calendar.
2- Upload the Print File: Copy and paste or drag your completed print file from Step 2 into the mockup file. It will appear as an array of all the design pieces.
3- Layer and Position Components:
Carefully move and scale each component of your print file (main panel, calendar rings, base stands) to align perfectly with the corresponding wooden layers on the mockup image.
Tip: Use Ctrl+J (or Cmd+J) to duplicate layers as needed for easier manipulation.
4- Add Depth Effects:
Apply Drop Shadow effects to the layers to give the wood/acrylic pieces a realistic, 3D look. Adjust the blend mode, distance, spread, and size of the shadows for the best result.
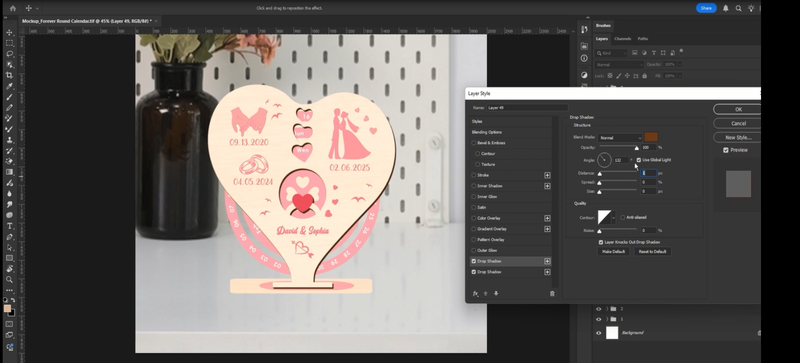
5- Refine the Edges (Using a Mask):
Group the calendar components together (Ctrl+G or Cmd+G).
Add a White Mask to the group.
Use the Brush Tool with the color set to Black to refine the edges of the pieces. This is often used to hide any excess design outside the object boundaries or to refine the edge where the calendar meets the base.
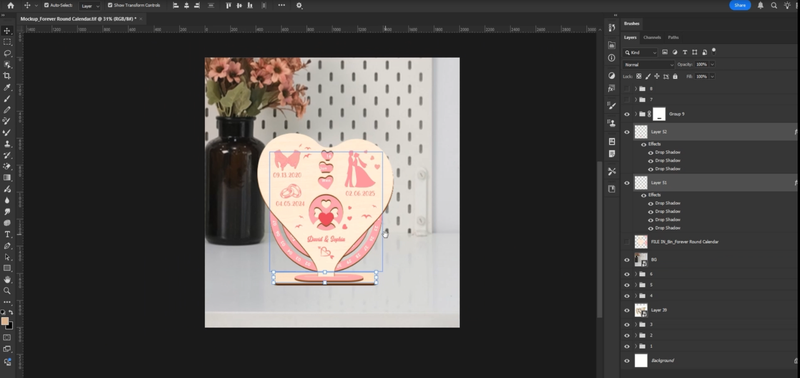
6- Final Adjustments and Export:
Ensure all components are aligned correctly, especially the base section. You may use the alignment tools in your software.
Once satisfied with the result, export the image to create your final, high-quality product mockup!
You have now successfully created a perfectly formatted print file and a stunning mockup for your Forever Round Calendar!
High-quality mockups are essential for driving conversions, so take your time to perfect the shadows and alignment. By following these guidelines, you'll minimize production errors and ensure your customers receive a beautiful, personalized product.
To understand more clearly, please watch the full guideline video here: Artwork Guidelines and Mockup Generator Guideline for Round Forever Calendar
Explore Forever Round Calendar here